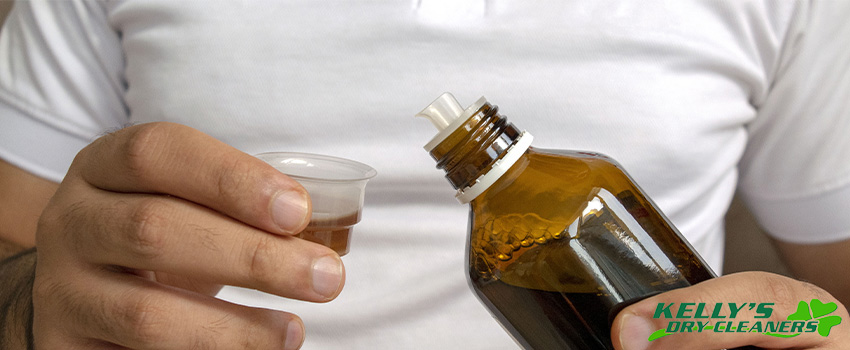
For most children, drinking medicine can be an unpleasant experience. That is why over the years drug manufacturers have added different flavors and colors, using dye, to make it more appealing to children. As children tend to be clumsy and move around a lot, it should come as no surprise that spills and stains can occur when parents try to get them to drink their medicine. However, those flavorings and dyes added to the liquid medicines make medicine stain removal from your child’s laundry even harder.
How to Remove Medicine Stains from Clothing
Liquid medicines are usually alcohol based and can be removed using the same method. Here are the steps you need to know regarding how to remove medicine stains from clothing as well as some pro tips in between:
Pro-Tip #1 – As with any other type of stain, medicine stain removal is much easier if the clothing is treated immediately.
Step 1: Rinse Stain with Warm Water
The first step in medicine stain removal is to run warm water over the spot where the stain is located. This will help loosen up the stain and dilute it. Usually a good portion of the stain will be washed away during this first step.
Step 2: Make a Medicine Stain Removal Mixture
The next step is to create a medicine stain removal mixture that you will use in Step 3. For this part, you need to mix the following:
- 1 tablespoon of any liquid laundry detergent
- 2 cups of cold water
- 1 tablespoon of distilled white vinegar.
Step 3: Sponge the Stain
Now, using a clean white cloth, dab the stain with your medicine stain removal mixture. Be sure not to rub the stain as this could make it spread even further. Then keep looking for a clean area in your white cloth and use that area to blot the stain away as much as you can.
Step 4: Rinse Your Clothing
When no more stain is being removed or is transferring to the white cloth, you can now rinse your clothing thoroughly with either cold or warm water. If the stain is gone, wash your clothing as usual using the instructions recommended on its care label. If not, then proceed to the next medical stain removal step.
Step 5: Prepare A Solution of Bleach and Water and Soak
If the stain has not been removed, get a large tub and fill it with cold water then add some oxygen based bleach. To know how much bleach to add, you can check the package directions. Then, submerge your stained clothing in the solution for at least 6 hours or, better yet, overnight. This will usually be enough to remove the stains. If not, then repeat this step by making another solution and soaking your clothing for another 6 hours. After doing this, you can now wash your clothing as prescribed by its care label.
Pro-Tip #2 – After washing your clothing, be sure to check for any stains left before putting it in the dryer. This is because the high heat of the dryer can set the stain and make it nearly impossible to remove. If you find any stains left, repeat the whole process above before drying the clothing.
Pro-Tip #3 – If the clothing is dry clean only, immediately get a clean white cloth dipped in cold water to blot away as much of the medicine stain as possible. Then, after removing as much as you can, bring it to a professional dry cleaner and point out the medicine stain that needs to be removed.
Liquid medicine stains are a common problem for people who have children. While medicine stain removal can be done at home, you must know how to do it properly or else the liquid medicine stain might spread further or become impossible to remove.
If you want to be sure that your medicine stains are removed properly or if you have been dealing with stubborn medicine stains that you can’t seem to remove, then it would be best to leave the medicine stain removal to a laundry professional.
At Kelly’s Dry Cleaners, we offer green earth cleaning in Durango and would be more than happy to help you with your liquid medicine stain removal problems. Bring your clothes to us today and we will do the rest!